Seeing that someone was trying to hit wp-login.php (WordPress login) a few times a minute on one of our servers at CF Webtools we decided to block any PHP requests since this is a ColdFusion server. It wasn’t as easy as I thought. This is a Windows 2008 R2 server running IIS 7.5 and ColdFusion 11.
Sample URL:
http://www.mysite.com/index.cfm/main/mypage/id/68249/id2/wp-login.php
At first I tried using Request Filtering under the “Rules”, “URL” and “Query Strings” tabs. These had no effect.
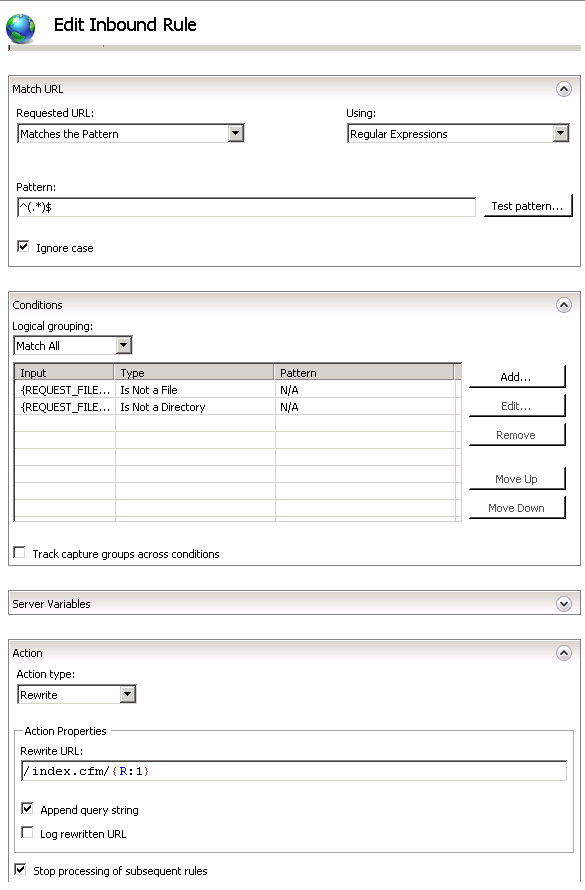
I then went to URL Rewrite where there was a custom rule to allow index.cfm to be absent from the URL.
<rewrite>
    <rules>
        <clear />
        <rule name="Rewrite FW/1 SES index.cfm">
            <match url="^(?!css|js|fonts)(.*)$" />
            <conditions logicalGrouping="MatchAll" trackAllCaptures="false">
                <add input="{REQUEST_URI}" pattern="^.*\.(bmp|css|gif|htc|html?|ico|jpe?g|js|pdf|png|swf|txt|xml|ttf|woff|eot)([/?].*)?$" negate="true" />
            </conditions>
            <action type="Rewrite" url="/index.cfm/{R:1}" logRewrittenUrl="true" />
        </rule>
    </rules>
</rewrite>
I then tried adding a rule using the default settings of wildcards. While the test responded okay, the actual page kept processing the URL.
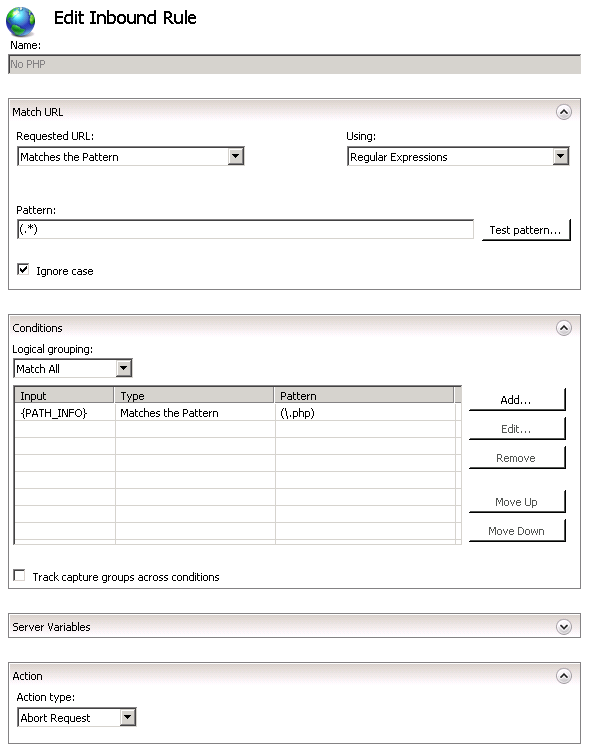
Thanks to Wil Genovese, after switching the regular expressions and enclosing those in parenthesis, “.php” requests were finally denied.
<rule name="No PHP" stopProcessing="true">
    <match url="(.*)" />
    <conditions>
        <add input="{PATH_INFO}" pattern="(\.php)" />
    </conditions>
    <action type="AbortRequest" />
</rule>